High-Quality 3D scans as the foundation for your Digital Twin
High-Quality 3D scans as the foundation for your Digital Twin
Digital twins offer unprecedented possibilities and can be used for a variety of smart solutions. But how do you map the current situation with the best scans required for the highest quality of your project? And what Scan-to-BIM technology do you need? Every location is different. Here are our tips and tricks.
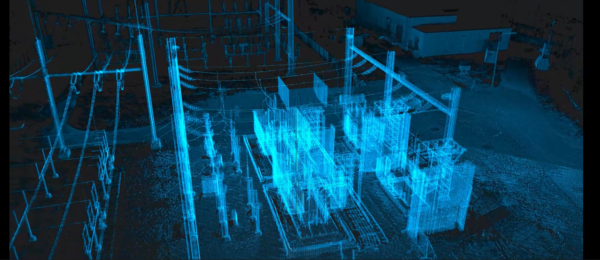
At first glance, the rule of thumb seems to be: the more detailed the scan, the better. However, the reality is more nuanced. First things first: what are we talking about? The raw point cloud data from 3D scans form the basis for modeling workable 3D object files. This allows you to quickly centralize all kinds of object information for an accurate digital twin.
Two Examples
Let’s look at two types of scanners we use at Allinq Digital. The Navvis VLX 3.0 is a mobile “harness scanner” with 4×20 megapixel cameras and 2 LiDAR sensors, each measuring 1,280,000 points per second up to 50 meters away. The Faro S150 scanner, on the other hand, is tripod-mounted with a 165-megapixel camera that scans 1,000,000 points per second up to 150 meters away.
Practical and Functional: The Mobile Scanner
The difference in image quality is clear. But a mobile, easy-to-carry scanner can be much more practical in certain situations—especially when not all details need to be visible in the final output. Such a scanner easily achieves a Level of Detail (LOD) of 200, a relatively good quality on a scale from 100 to 400.
Moreover, lighter files require less powerful processing equipment. By adjusting the workflow, this LOD can be upgraded to LOD300, reaching a maximum height of 15 meters. The mobile scanner’s LiDAR sensors also capture a higher point density.
High Quality, More Time: The Static Scanner
The advantage of a static scanner is that it stays in place and captures significantly less noise. This means better results with fewer points. However, the downside is time. Using the static Faro scanner, it’s wise to first assess the required quality and the conditions in which the scan will be performed.
As the examples show, there’s a noticeable difference in quality between a 7-minute scan (LOD300) and a 20-minute scan (LOD350). With this device, every bolt and nut of a setup can be detailed.
Streamer notes: “It’s smart to evaluate the required quality and the conditions under which the scan is made.”
An important consideration when choosing scanning technology is the distance to the object. If an installation is 10 meters or taller, we always recommend a 20-minute scan to ensure good quality throughout the space—assuming LOD300-350 is required.
A Quick Calculation
If time is limited on-site, that can be a reason not to choose the static scanner. Take the Faro S150: it’s more precise but requires multiple setup points to fully map the environment. Each setup point takes 7 minutes. If 20 setup points are needed, that totals 140 minutes of scanning time—excluding setup time. That’s significantly more than the mobile scanner’s 20-minute scan. So, if time is a critical factor, the mobile scanner is the better choice.
Allinq Digital addresses this issue in part by using eight Faro scanners. On a single project, we often deploy 4 to 5 scanners simultaneously to reduce the acquisition time. Soon, we’ll be upgrading our static scanners, which will reduce acquisition time by 50%.
How to Choose?
In short, several variables play a role in scanning an environment. Allinq Digital doesn’t always aim for the perfect image but focuses on delivering an image that meets the purpose (fit for purpose). How do you determine this? Use this handy checklist:
• Quality vs. Time: How do you balance the need for high image quality against the benefits of a mobile, portable scanner, especially in situations where extreme detail isn’t required?
• Level of Detail (LOD): What will the point cloud be used for? What quality is required, and how does this influence the choice of scanner and scanning method?
• Environmental Factors: Under what conditions (e.g., height) will the scans be performed, and how does this impact the choice of scanner and the quality of the scans?
Want to Learn More?
We’re happy to advise you on all the ins and outs of scan quality, for instance, during a demo session. Since 2017, we’ve been converting point clouds into 3D models, enabling us to offer expert guidance on the possibilities and limitations of Scan-to-BIM technology. It’s all about modeling workable files from the point cloud, and we can handle this entirely in-house for you. Curious about how our ongoing innovations can support your projects? Get in touch with Leander Goor.